Life is more fun when you RAWR!


Showing posts with label crafting. Show all posts

Wednesday, October 12, 2011

DIY: From Place mat to purse

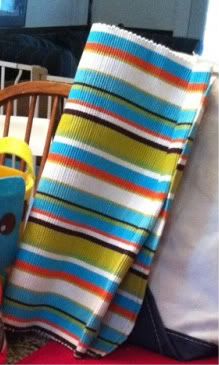
So, I found a single awesome place mat at the new local thrift store and fell in love.
So stripey.
So cheerful.
So lonely there with no matching place mat friends.
Don't you worry happy little place mat.  I have an idea for you.
You'll be an awesome purse in no time!
This project is insanely easy, requires sewing as few as two straight lines and you can make it as complex or as simple as you want.

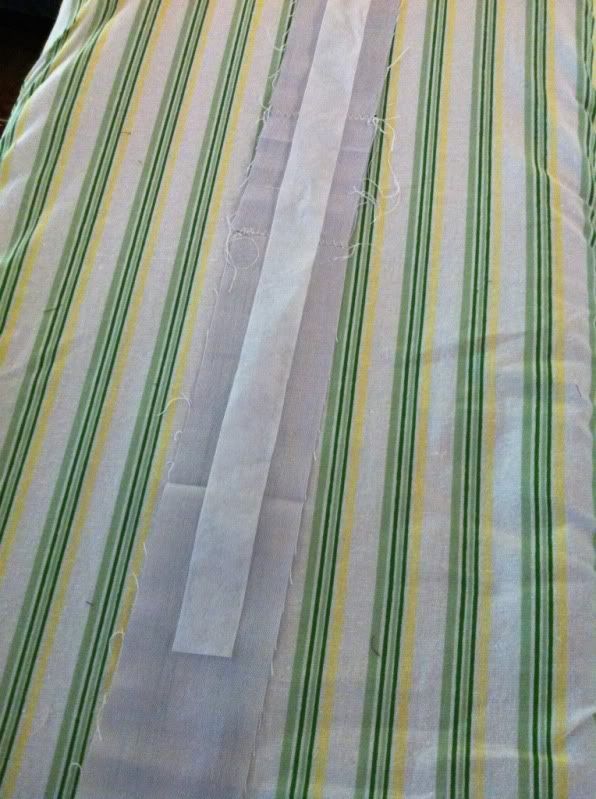
The first thing I did was make a strap by cutting a 1.5 inch strip about 16 inches long.  I ironed on a small strip of interfacing down the middle then folded in the sides 1/4 inch, ironed then folded in the sides again and ironed again making a long strap that I zig-zag stitched down the middle.

Fold your place mat in half.  This is the body of your purse.  We'll stitch up the sides in a minute but lets add some function inside first.
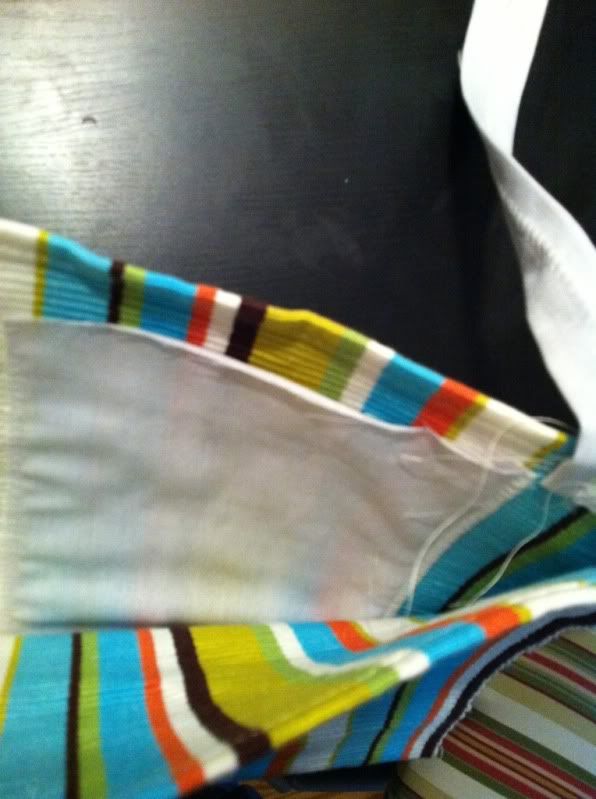
Using the same fabric I used to make the strap, I sewed a small pocket into the inside of the purse.  I measured the pocket to accommodate my iphone.  You cold make a phone pocket, a key pocket, add snaps or zippers or skip this all together.
Time to add the strap by sewing it where want it.  Sew it into the inside of the purse because it looks neater that way.
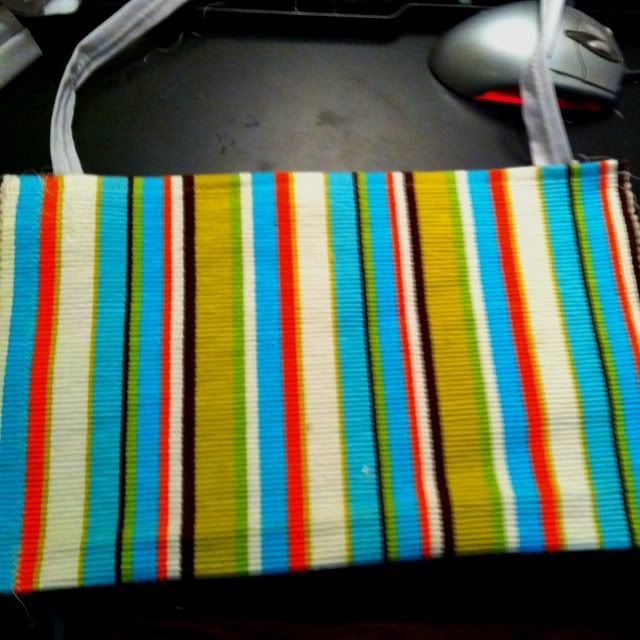
Now, sew up the sides.  To make it super secure go over your stitches a few times.  If the edges of your place mat are prone to fraying you can sew it inside out and flip it, keeping the seams on the inside.  My place mat had nicely finished edges so I simply stitched up the outside and was done.
A lonely thrift store place mat became a cute, functional purse for under $1 and in less than 1 hour.
It doesn't get better than that!

Tuesday, August 30, 2011

A few recent crafts

My crafty side has been ignited again.  I've been crafting a lot over the past week and I'm pretty pleased with the results.
 First, another set of bean bags.  I'm really happy with how these turned out and I hope that my niece will love them too.  I especially love the color combinations on these.
The second is a baby gift for one of my husband's graduate students who just became a dad for the first time.  I made burp cloths and an appliqué onesie. Both projects couldn't be easier.


For the burp cloths I simply sewed flannel down the middle of a Gerber organic prefold diaper.  Viola! A cute, personal burp cloth that's super absorbent.  For the onesie all I needed was a scrap of wonder-under, a scrap of cute fabric and a onesie.  Cut the wonder-under into the shape of a heart and iron the rough side to the back of your fabric.  Cut the wonder-undered fabric out and peel off the paper on the back of the fabric, iron it on to the onesie and then zig-zag stitch around the outline of the heart to secure it to your onesie.

It took just a couple of hours from start to finish on the baby gifts (the bean bags take a little longer because they're sort of putzy with all the appliqué).  All in all, both projects are fun, interesting and very satisfying at the finish.

Wednesday, July 27, 2011

Bean Bags

After a long sewing inspiration drought I finally found a fun little project that inspired me to get back at it.
http://sewlikemymom.com/bean-bag-tutorial/

I chose to make my bean bags without the "tags" because, frankly, I don't like those taggy things.  They look like invitations for trouble wrapped all over a kid's favorite toy.   

Other than that, I pretty well followed her instructions, doing the appliqués first.  What's awesome about these bean bags are you can use those little bits of fabric that you love so much and hoped to find a use for in the future.  You can also do a lot of great mixing, matching and coordinating.

I actually sized and centered my "top" fabrics after doing the appliqué.  No real reason I guess, other than I was anxious to get sewing.
 

The finished  products are fantastic.  I love how they turned out and I love how fun, easy and yet personal these bean bags are as both a project and a gift.

I filled two of the bean bags with beans.  The other I filled with rice and in the future I'll likely fill all of my bean bags with rice.  They're softer that way and can be put in the freezer or microwave as a "boo boo bag" as needed.

Wednesday, March 23, 2011

It's sew-Wednesday


We recently celebrated my four-year-old son's birthday (a week early but he doesn't know the difference) and of course I wanted to make him an awesome shirt and he wanted a hat.  
The idea for a vest shirt came to me the second I saw this fabric (I found it at Hobby Lobby).  There's something so delightful about argyle.  I also knew I wanted the shirt to have a matching bow tie.  My friend Megan knew it needed real buttons.   We worked on the project together.  It's a simple project that involved wonder-under on the argyle, ironing it onto the shirt and sewing around the edges.  Megan actually cut out and sewed on the bowtie.  It was a two step process - first the "wings" then the "knot" but in all it took us less than 30 minutes to make the pattern on freezer paper, cut it out and sew it all on.  I'm pretty proud that we did this from scratch and it came out exactly how I was picturing it.

The crown is also a really simple project that makes your birthday boy/ girl feel special.  There is a tutorial and pattern here.  I did not use two layers of felt.  I used one layer of felt and the cotton (argyle) for the reverse appliqué.  I hand sketched the four on top rather than use a pattern.  He *loved* this crown for his birthday. I thought it was a perfect way to have a birthday boy look dapper without being fussy.

Friday, March 4, 2011

Super Boy!

Have you been following MADE's "Let's Hear it for the Boys!" month?  I've been excitedly reading the blogs every day and when I saw the tutorial for super hero capes I jumped up and down and cheered.  This is the perfect thing to make for my nephew's 5th birthday.
Economical *and* easy?  It's all true.
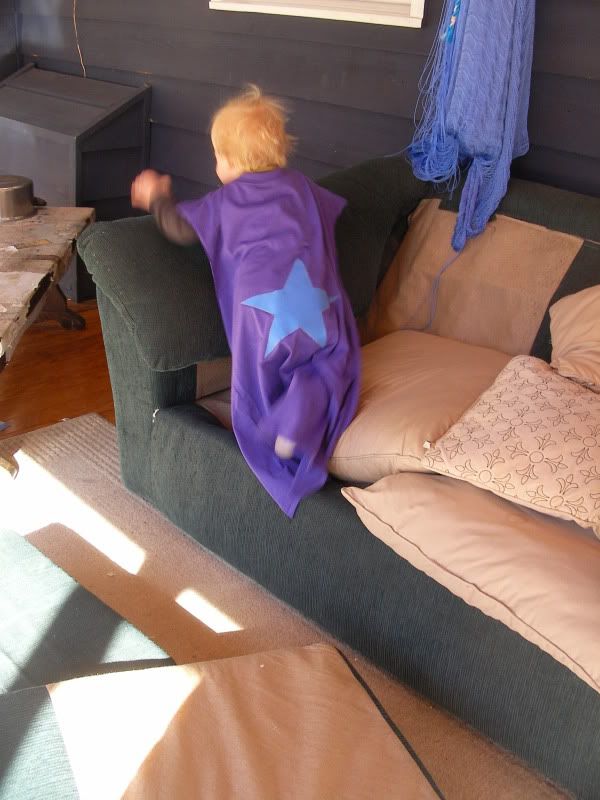
I don't have much to add to add to the tutorial.  I did an appliqué star rather than fabric paint (I know, shocker, right?).  I also did not trim the bottom as Michael is really tall.
This is a very quick, very easy project that a non-sewer could do with no issue using a glue gun or fabric glue for the Velcro and fabric paint to embellish the cape.  The best part of something like this is that it can be customized to any personality.  Is your kiddo great at reading?  Decorate the cape with a book!    Do they love broccoli?  Aha! Captain Broccoli!
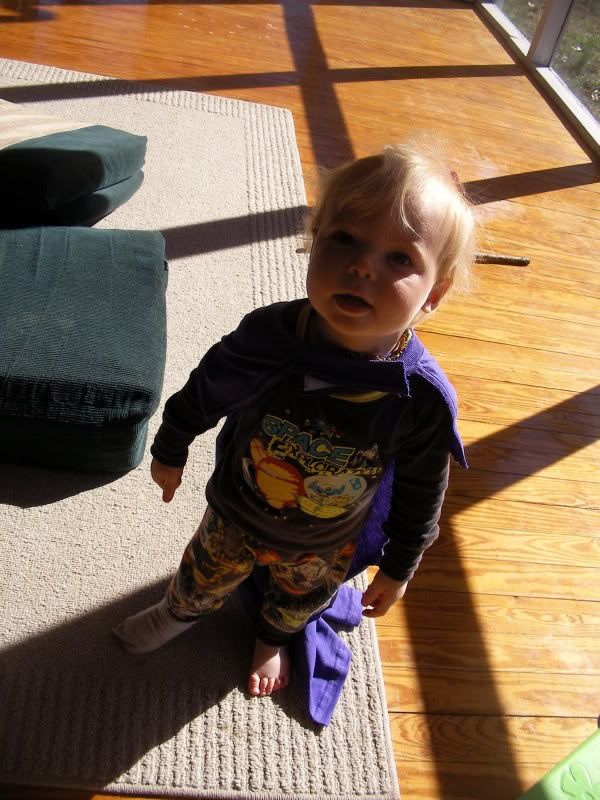
Here's my youngest modeling the cape before it was wrapped and shipped to Texas.


I purchased a new shirt for this (since it's a gift) but I'll make capes for both of my boys and they'll come from dad's old shirts thus making it a no-cost project.
Enjoy!

Wednesday, February 9, 2011

Fundies and a lovey quilt

An unfortunate cold has kept me down but I'm not out! 
My crafty projects are back in full swing.
First, a shirt and some "fundies" (fun undies) for our local LLL silent auction.  I am so in in love with the fundies.


The t-shirt I'm a little iffy on.  It's supposed to be "Get a Clue" as in Blue's Clues.  When I showed it to the family though the said "Get a paw" and well, crap.  It's sort of cute still but man, it must not read right.

 I also made a little lovey-quilt for a special baby born this week.  I made up my own pattern for this and I think it came out pretty cute.  I also free-quilted it which was a first and was sort of like dancing at my sewing machine.  I'm not going to lie, it has one seriously busted corner.  I fixed it but it wasn't pretty.
 
 One thing I have to learn to do is slow down and enjoy quilting.  Not every project can or should be done in an hour but I am impatient and that gets me into trouble with sloppy seams and corners that I have to re-do.  Patience is one virtue I was not blessed with and I'm trying my best to learn to slow down and do things more thoughtfully.  Not just in quilting but in life. 

Tuesday, February 1, 2011

Let's Hear it for the Boys

Finding crafty projects that benefit boys is really difficult for this crafty mom.  Too much cutsey makes the boy look silly and, at least for my boys, it's just not their style.
That's why freezer paper shirts are perfect. You can make your own design to fit your own child's personality.
Additionally, I love for my kiddos to have holiday-themed shirts since they get so excited for holidays but I really dislike spending a fortune on any clothes for my kids since they are so generally rough on them.
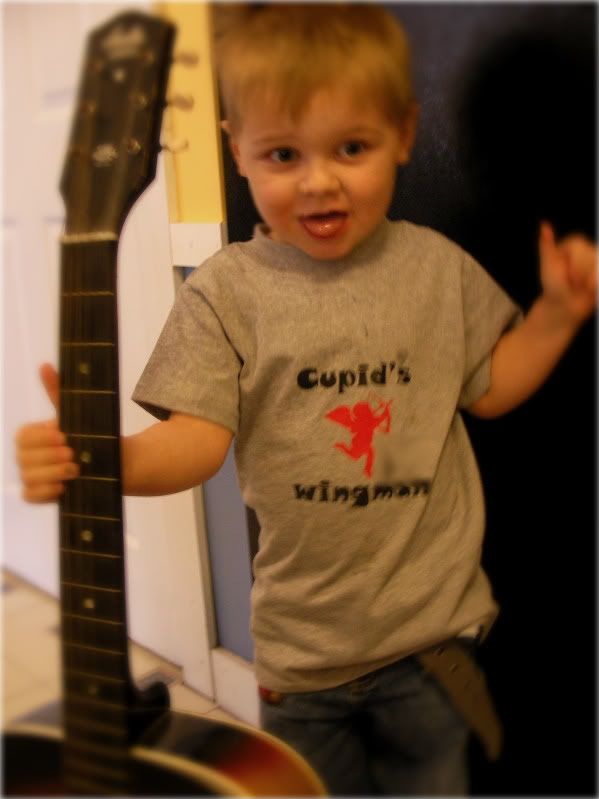
So, I present to you Grant's Valentine shirt:

If you can't make out what it says - it's "Cupid's Wingman."  And I did think that up all by myself as opposed to seeing it somewhere and making it my own.   Hooray for me!

To make the shirt I used the same technique described here.  This time though I used two colors of paint (applied at the same time).  I also made my very own SVG file for the cupid icon, something that's very very simple to do with Sure Cuts A Lot's trace feature. If you want a copy of the cupid.svg or just a copy of that cupid.jpg to make a similar shirt (it's a simple enough drawing that you could easily print it and cut it out with an exacto knife) just leave a comment here with a way to contact you and I'll send it your way.

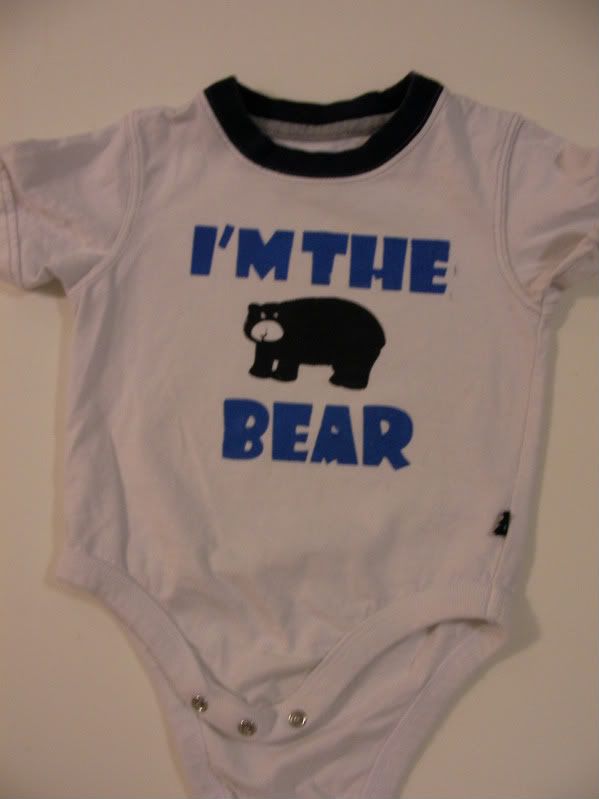
And when you're the mom of a bear, you want him decked out in bear gear.
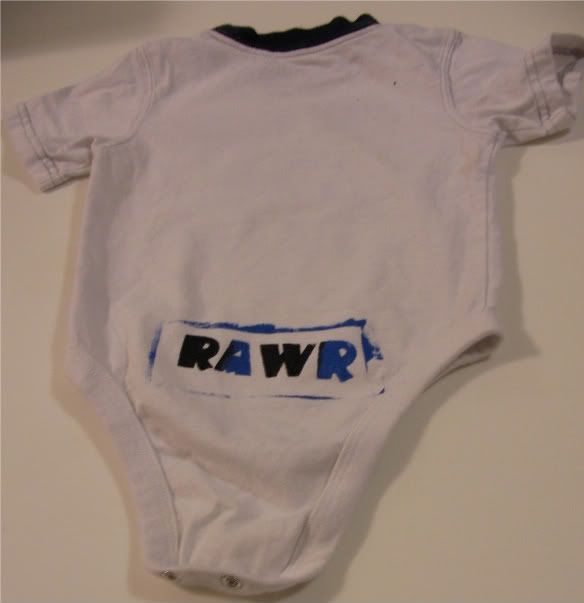
Today I saved a onesie from the rag bin with just a little paint!
Front view:


Back view:


There is something just so right about how this turned out.  It is absolutely perfect for my little bear.  I got a little creative by painting around the edges of my stencil on the back of the onesie and I really like how that turned out.  I'm actually now thinking of making my own personal tags say "Rawr" in this font and everything.

Sunday, January 30, 2011

How I hacked my Cricut

I was so very excited when I purchased my cricut.  I got it last summer after drooling over it during middle-of-the-night-baby-feeding infomercials.  After about five minutes of watching that infomercial I walk away wondering how any self-respecting mother can possibly exist without a cricut at their disposal.  I mean, the possibilities!  Oh the possibilities!  And keep in mind, I am not a scrapbooker.  I want my house covered in Vinyl quotes and fun, seasonal decorations.
And in fairness, I've used the cricut a fair amount.  I've cut fabric, made cards, made birthday party decorations, gift tags, bin labels... the list goes on.
Now though, I'm frustrated.  The designs on cricut cartridges are too complex for my needs (most of the time).  And I have a vision for a few projects that I'm working on that are specific and the cricut just isn't cutting it (pun fantastically intended).
So tonight I rang the bell.
It was time to turn to Sure Cuts A Lot.
It was a little tricky because we are a Linux family and SCAL requires Windows or Mac.  Luckily I do have one laptop with a Windows partition (allowing me to access I-Tunes when necessary).  I had to do a lot of updating... usb driver updating twice as well as two firmware updates for my cricut but now I have the freedom to cut out exactly what I want.  FREEDOM.  If I want to fill my entire cutting mat with one letter I CAN!  Hooray!!  No more $50 cartridges that fill only specific roles.  FREEDOM!!
  Of course, now that it's done it's midnight so hopefully tomorrow I can play with fonts and svg files and get these projects done!

Friday, January 28, 2011

In which: I join the freezer paper bandwagon

I've had my eye on doing freezer paper t-shirts for a while.
I first saw the technique on MADE and fell instantly in love. Little Bit Funky is in on the freezer paper action as well. It's the perfect project because it's fast, simple, inexpensive and has near-instant gratification.
So here we go:
Freezer Paper shirts Julianna style!

First the freezer paper.

I bought a big roll of it at Target. It's in the same section as the tin foil and plastic wrap. I had to hunt for it a little
I cut the shape out using my cricut and the Wild Card cartridge. I wanted to make a Valentine's shirt so I found a card element that was "Valentiney." I put the freezer paper right on my Cricut cutting mat and cut away.
When peeling your paper off your mat remember that you're painting in the negative space so save any small dots for eyes and inner parts.

Next: iron the paper to your shirt (shiny side down)


It's time to paint! I chose a matte fabric paint (did you know they actually still sell puff paint? It's like 1988 all over again!) and used a sponge brush and applied a thick coat.

Put something in the shirt to keep the paint from bleeding to the other side. I used a paper grocery bag. I save tons of those paper bags thinking they might come in handy. And look! They did!
Let the paint dry then peel off the paper.
Iron over the paint to set it. DO NOT IRON ON IT DIRECTLY. COVER THE PAINT WITH ANOTHER CLOTH FIRST.

And there you have it... a fantastic custom shirt!  It looks even cuter on our model!
This is Grant's Valentine Ella.  Her mommy blogs over here.


I purchased all of my supplies at Hobby Lobby. The shirts were less than $3 as was a tube of paint which will last for a really long time.
I'm super excited to do custom shirts, bags, hats, etc using this technique because it's simple and fun.

Friday, January 21, 2011

Another shawl and a tshirt.


As promised, I completed my second prayer shawl for my cousin Kevin.

I hope to send it off this afternoon.
These shawls are very simple to make. See my tutorial here.

I also finished a tshirt for a special four-year-old. It came out super cute if I do say so myself.

Want to do a shirt like this of your own? There is an excellent tutorial on Little Bit Funky. I had to get a little creative with this shirt since Buzz and Woody are too big to be inside the four but I think it came out awesome. I hope the birthday boy likes it!.

Thursday, January 20, 2011

Thursday Weigh In

Another Thursday another weigh in another 1.4lbs lost! That brings my total to 19.6 which the receptionist I try to avoid at weight watchers refused to round to 20lbs. But hooray for 19.6 total pounds lost! This despite the "pretzel turtles" my friend Nicole made for Bunco earlier this week. I managed to not sit down and eat the entire tray of them (as was flashing in my fantasies while rolling dice. Also involved in the fantasy a marathon of bad TV like America's Next Top Model or similar).

I'm also still getting craft. Tonight I'll finish binding a second prayer shawl, this one for one of my cousins who is battling cancer. Next up is a shirt for a special four-year-old and another prayer shawl that a friend of mine asked me to make so she can give it to a friend of hers who is battling breast cancer. I'm pawing at the fabric for that shawl as I type and oh it's so soft and has the most beautiful color tones. After that prayer shawl I'm going to work on some freezer-paper projects (Yippee!), repurposing some old picture frames and I've been scouting some headboards and china hutches. I'm starting to get an idea of what I'm looking for in both departments. Also, I bought some awesome robot fabric for Andy's headboard and pillow case. So why am I sitting here typing?? It's time for me to get creating.
As always, pictures of projects are coming.

Thursday, January 6, 2011

Mod Podge Collage

It's that time again... time for my Mod Podge Collage.

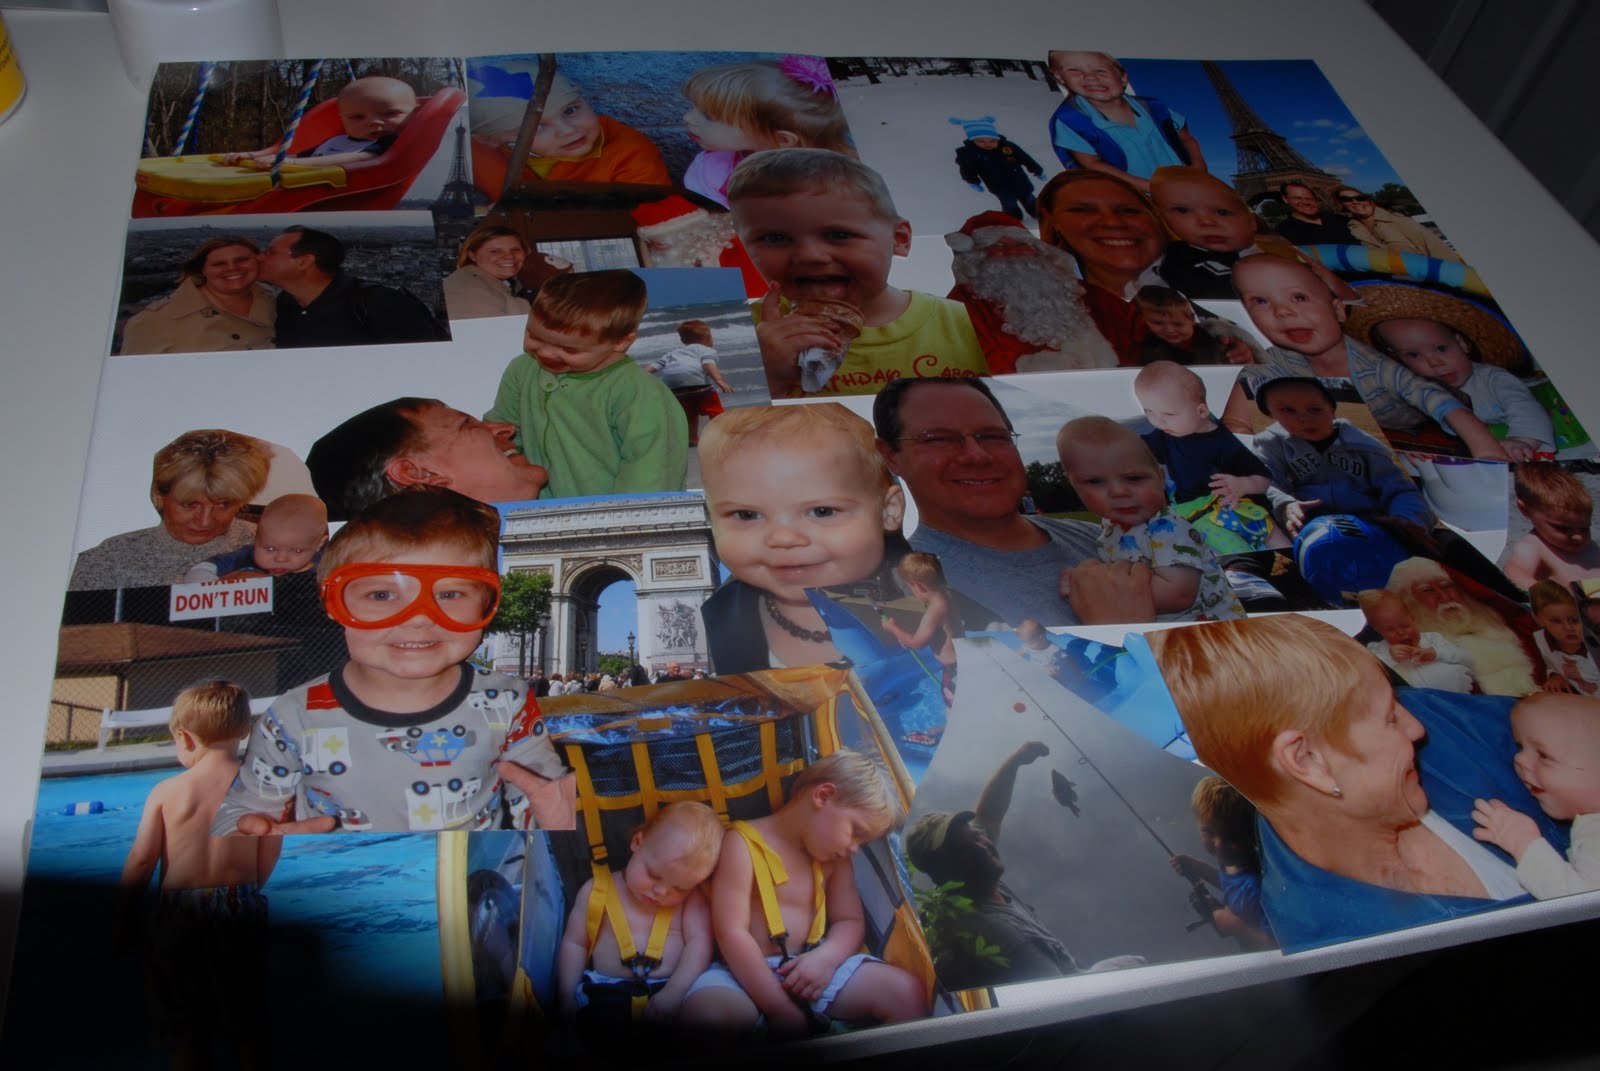
Every December since 2005 I've printed out pictures of our family throughout the year and turned them into a fun collage that we hang in our kitchen. They're a great conversation starter when we have people over and really they tell the story of our family in a fun, special way. In 2005 you can see our trip to Gettysburg, our moving truck, my brother before he left on his mission. 2006 has my brother-in-law's wedding, my baby shower, my nephew's birth. 2007 has me becoming a mom. 2008 has our snow and travel adventures. 2009 has me becoming a mom again (from positive pregnancy test to baby shower to birth) plus me with Ben Folds! Now 2010!! It has Paris, it has the beach, the pool, snow, Santa, all of our fun times summed up. Admittedly, 2005's collage isn't nearly as well done as 2010's. I've gotten pretty good at these over the years. It's a really easy, fun project to do and since I've ironed out the kinks, here's a quick tutorial.

What you need:

A canvas

A ton of pictures from throughout your year. Go for pictures where the background can be cut out but you still know exactly what the picture is about. I happened to order mine from shutterfly. It really doesn't matter. What does matter is that they are a matte finish NOT GLOSSY. The ink from your glossy pictures will run when you put the glue on them.

Scissors

Mod Podge

A paint brush.

This year I tried using spray adhesive but, meh, made no difference so feel free to skip it.


The first thing to do is cut out your pictures. Go for pictures that don't have a lot of fine, subtle details. Those details will be lost in the “bigger” picture. Cut out extraneous backgrounds but save those pieces. They're great for filling in small white spaces.

Here's an example:

A cute picture of father and son fishing. We don't need the whole lake to make it clear what they were doing, so cut it out!


Still a cute picture but much smaller and with interesting edges so other pictures can overlap a little bit.

Once you've cut everything out start playing with them on the canvas. It's like putting together a jigsaw puzzle with no right answer. You want everything to look cohesive but not too planned.

Watch for having clumps of the same season or person. I think it looks better when there is a picture of kids playing in the snow next to mom lounging at the beach. You may disagree. Play with it and find out. Also if there are any glaring empty spots that aren't big enough for another picture, fill in with pieces of generic background that you've cut out.


Next come the Mod Podging. I've done this two ways. A few of the years I've taken everything off of the canvas once I've played with it and coated the canvas with the mod podge then stuck everything back on. Some years I've put the podge down before I started playing with the pictures but that makes a huge mess of the pics. In my opinion the best way to do this is to lay out your pictures then gently use your paint brush to coat everything with the the Mod Podge. If some of the pictures start moving put a little podge on the back and they'll stick down. You may also need to lift up some of the edge pictures and coat the backs so they'll stick. Coat the whole canvas. IT WILL GO ON WHITE.

Do no worry. It dries clear. I always let mine dry about 24 hours.


Don't forget to label your collage with the year! Use stickers, cut them out, write them on. Use your imagination.


Hang it up and enjoy!


This project is easily done in two hours but it's something your family will enjoy for years to come!